Amazon Ad

Thursday, February 2, 2017

Crafting and Smelting Recipes

Hello, my name is Alex and I am going to show you how to create a mod for minecraft forge 1.11.2. There's not a lot of tutorials on 1.11 so I am creating one for those that want to get started.

WARNING: IF YOU DO NOT KNOW ANYTHING ABOUT JAVA, PLEASE LEARN THE BASICS BEFORE ATTEMPTING TO FOLLOW ANY MODDING TUTORIALS!!!!!

In this tutorial we are going to be looking at how crafting and smelting works in forge. Let's start by creating a class called CraftingHandler in our "handlers" package. In here we will have a method called init (returns a void, static).  In this we will refer to GameRegistry.addRecipe. This method takes in two parameters: the crafted item, and the ingredients. Below is how we will be writing the line of code:


1
GameRegistry.addRecipe(new ItemStack(<youritem>, <amount>), "", "", "", '', <ingredient_1>, '', <ingredient_2>, '', <ingredient_3>);

Replace <youritem> with the item you want to output, let's make the pickaxe we made. So replace <youritem> with our pickaxe.

Next, replace <amount> with the amount that you want to output. Most output only 1, so in this case we are going to put 1, because, I mean, like, who needs to get multiple swords out of one recipe? Uh...nobody!

Now is the tricky part, the actual recipe. The 3 strings are going to go through a pattern recognition. Each of them represent a row on the crafting table, the first string being the top row, the second string being the middle row, and, you guessed it, the third string for the bottom row. Each of them MUST have 3 characters. If you want a blank space, you just put a space.

The third part of the method is telling the game what each character represents. You can have as many as you want, as long as it has at least one. It takes in a char, which is a character surrounded by single-quotes, followed by the ingredient you want, and so on and so forth.

Let's plug in the missing links, shall we?


1
GameRegistry.addRecipe(new ItemStack(ItemHandler.tutPickaxe, 1), "XXX", " C ", " C ", 'X', ItemHandler.tutItem, 'C', Items.STICK);

As you can see, I am only using the middle slots of the middle and bottom row, leaving the edges blank using a space. The end result is this:


Next we gotta put it in the postInit of our CommonProxy. Call the init within our postInit of CommonProxy and you should be good to test it. Make the other recipes for the rest of the tool set, too.

============================================Smelting==========================================

Smelting is very similar. Let's create a handler for it called SmeltingHandler. In here we will also create an init method. This init method will have our smelting recipes in it, obviously.

To add a smelting recipe, we need to call on addSmelting from the GameRegistry class. This takes in three arguments: input, output, and xp. The input takes in an Item or a Block. Let's add our item and make it smelt into another item, which we will then use for crafting.

Let's create the item in our ItemHandler and call it carbite. This will then initialize to a new ItemCarbite class, with the same parameters as our tutItem. Create the class, extend it to ModItem and create the constructor. Now to create the the JSON files. Just copy and paste our tutItem JSON files and change all the naming to carbite. Create the texture and model files and we should be good to go, and make sure you register and render it, too.

The following line of code is how we will create the smelting recipe:


1
GameRegistry.addSmelting(ItemHandler.tutItem, new ItemStack(ItemHandler.carbite), 1.0F);

We are passing through our tutItem as the input, and the newly created carbite item, as the output. The last parameter is how much experience you will get from it. 0.7F is iron, 1.0F is gold and diamond. We are giving this a lot of XP.

Next is to call it in our CommonProxy.postInit, and run the game. We should now have a smelting recipe.

Next we gotta change our crafting recipes to take in the carbite we made.

The end result should be this:


Don't forget to name your items!!

Tools

Hello, my name is Alex and I am going to show you how to create a mod for minecraft forge 1.11.2. There's not a lot of tutorials on 1.11 so I am creating one for those that want to get started.

WARNING: IF YOU DO NOT KNOW ANYTHING ABOUT JAVA, PLEASE LEARN THE BASICS BEFORE ATTEMPTING TO FOLLOW ANY MODDING TUTORIALS!!!!!


Now we get into the more complicated stuff. Tools are beginner to intermediate in minecraft modding. Let's get started.

Firstly, create five new Items in your ItemHandler. Call them, tutPickaxe, tutSword, tutAxe, tutSpade, and tutHoe. We will initalize them like this:


1
2
3
4
5
tutPickaxe = new ItemTutPickaxe("tut_pickaxe", MaterialHandler.TUTORIAL, CreativeTabHandler.tabTools);
tutSword = new ItemTutSword("tut_sword", MaterialHandler.TUTORIAL, CreativeTabHandler.tabCombat);
tutSpade = new ItemTutSpade("tut_spade", MaterialHandler.TUTORIAL, CreativeTabHandler.tabTools);
tutHoe = new ItemTutHoe("tut_hoe", MaterialHandler.TUTORIAL, CreativeTabHandler.tabTools);
tutAxe = new ItemTutAxe("tut_axe", MaterialHandler.TUTORIAL, CreativeTabHandler.tabTools);

Create the classes necessary for fixing these errors, but make their super classes ItemPickaxe, ItemSword, ItemSpade, ItemHoe, ItemAxe, respectively. Add the constructors and add the first parameter for the constructors String name, and the last parameter takes in a creative tab instance. We need to add the registry names for each of these so let's set them in the constructors:


1
2
setUnlocalizedName(name);
setRegistryName(name);
setCreativeTab(tab);

Put these two lines of code in each of the constructors. Next, we must create the MaterialHandler class that we will use to handle all of our tool and armor materials. We will create, in there, a static ToolMaterial called TUTORIAL. We will initalize it using the following code:


1
public static ToolMaterial TUTORIAL = EnumHelper.addToolMaterial("tutorial", 3, 2500, 5F, 5F, 20);

EnumHelper is how we add constants to the list of tool materials. We give it an unlocalizedName, harvest level, durability, damage float, efficiency float, and an enchantability.

The harvest level is the level in which our tools harvest at, diamond being 3.

The durability is how many uses this tool material has. It is how many times you can click with it before it breaks.

The efficiency is how fast the tool mines blocks. Diamond is 8F.

The damage float is how many hearts of damage it does to entities. Diamond is 3F,

The enchantability is how well it is enchanted. Gold is 20, and that is very high.

Next we have to register the items and render them. So let's create the item models necessary for them. Copy from diamond tools in Referenced Libraries > forgeSrc > assets > minecraft > models > item.

Create the five files, named after your registry name, and paste in the JSON code form each of their respective diamond cousins' files.

Also, make some textures. Rename "items/diamond_<tool>" to "tut:items/tut_<tool>".

Don't forget to go to our creative tabs handler and set the tab icons for each of the tabs.then set each of the tools to their respective tabs.

With some recent updates, we have to make a change to our ItemTutAxe class. In the super() call, we need to set an efficiency and damage floats. We can achieve this by calling on our material's efficiency and damage floats.


1
super(material, material.getDamageVsEntity(), material.getEfficiencyOnProperMaterial());

This allows us to pass through our material's damage and efficiency without having to hard code it in.

Let's run the game and test out our newly created tool set!


Looks like we gotta add some names. Let's go into our "en_US.lang" file and add them.


 1
 2
 3
 4
 5
 6
 7
 8
 9
10
11
tile.tut_block.name=Tutorial Ore
item.tut_item.name=Tutorial Item
item.tut_sword.name=Tutorial Sword
item.tut_pickaxe.name=Tutorial Pickaxe
item.tut_axe.name=Tutorial Axe
item.tut_hoe.name=Tutorial Hoe
item.tut_spade.name=Tutorial Shovel
itemGroup.tab_blocks=Mod Blocks
itemGroup.tab_items=Mod Items
itemGroup.tab_tools=Mod Tools
itemGroup.tab_combat=Mod Combat

Now if we run the game, they should be fully functioning and named. Now if only we could craft them! *hint himt*

Creative Tabs and en_US.lang

Hello, my name is Alex and I am going to show you how to create a mod for minecraft forge 1.11.2. There's not a lot of tutorials on 1.11 so I am creating one for those that want to get started.

WARNING: IF YOU DO NOT KNOW ANYTHING ABOUT JAVA, PLEASE LEARN THE BASICS BEFORE ATTEMPTING TO FOLLOW ANY MODDING TUTORIALS!!!!!


In this tutorial, we will be looking at putting all of our items and blocks into their own creative tabs. Creative tabs do not have a separate registries, it's just using it in your mod that makes it appear. CreativeTabs is an abstract class, and for a good reason, too. If you don't know what an abstract class is, it is basically a class that cannot be instantiated. This way, you actually set the properties by calling the methods within the initialization. You'll see what I mean in a moment.

Let's start off by creating a class in our handlers package, called CreativeTabHandler. This is where we are going to put all of our Creative Tabs. We need a static field of the type CreativeTabs with a name in the form of tab<yourtabname>. Of course, you can always name this whatever, but it's good practice to give a convention to your fields. The first creative tab we will make will store all of our blocks. We will call this tabBlocks.

This will initiate to a new CreativeTabs with a given name, set as a parameter, but instead of ending it off, we need to treat it like a method, and add the unimplemented method, being getTabIconItem.

1
2
3
4
5
6
 public static CreativeTabs tabBlocks = new CreativeTabs("tut_blocks"){

  public ItemStack getTabIconItem() {
   return null;
  }
 };

getTabIconItem is how we set the tab icon and what block or item it should display. We give it the name "tut_blocks". We need to give this tab a tab icon. We will make it our block, created in the blocks tutorial.

1
return new ItemStack(Item.getItemFromBlock(BlockHandler.tutBlock));

It returns a new ItemStack, I don't know why but I am guessing because it is handled easier than just an item, but I personally see no reason to return an ItemStack. We need to convert our block to an item, so we get the ItemBlock from our block.

Next is actually using it, so go on over to your BlockHandler class and change the creative tab argument to our newly created tab.


1
tutBlock = new BlockTutBlock(Material.ROCK, "tut_block", CreativeTabHandler.tabBlocks, 5F, 15F, 3, "pickaxe");

This will allow us to place our block in the creative tab we created. If we run the game, it should be there for us, as shown below.


===========================================Bonus=============================================

Let's make a couple more, shall we? Make three more tabs, one for items, one for tools, and one for weapons. Make the item tab have the tab icon of our tut item. For now, just leave the tab icons for the last two null, and don't use them until the tools tutorial.

We need to give everything names, like, proper names, that are readable. So we shall go into our resources folder and create a package called "assets.tut.lang". This is where we will put a file rightly called "en_US.lang". Make this file and in it we will name all of our components.

The convention of a .lang file is this:

Blocks: tile.<unlocalizedName>.name=Your Block Name
Items: item.<unlocalizedName>.name=Your Item Name
Creative Tabs: itemGroup.<unlocalizedName>=Your Tab Name

Here is what mine looks like:


1
2
3
tile.tut_block.name=Tutorial Ore
item.tut_item.name=Tutorial Item
itemGroup.tut_blocks=Mod Blocks

Run the game and you should be good to go!

Blocks

Hello, my name is Alex and I am going to show you how to create a mod for minecraft forge 1.11.2. There's not a lot of tutorials on 1.11 so I am creating one for those that want to get started.

WARNING: IF YOU DO NOT KNOW ANYTHING ABOUT JAVA, PLEASE LEARN THE BASICS BEFORE ATTEMPTING TO FOLLOW ANY MODDING TUTORIALS!!!!!

In this tutorial we will be looking at setting up a block for ourselves. We will be creating an ore for our tutItem. Let's start by creating a new class in our handlers package, called BlockHandler. In this we will have all the same methods as our ItemHandler:


 1
 2
 3
 4
 5
 6
 7
 8
 9
10
11
 public static void init(){
 }
 
 public static void register(){
 }
 
 public static void registerRenders(){
 }
 
 public static void registerRender(){
 }

In our registerRender() method, we need to add the parameter Block block. This will allow us to create an item from our block and then render it in our inventory as an item.

1
2
 public static void registerRender(Block block){
 }

Within this method we will add two lines of code:


1
2
Item item = Item.getItemFromBlock(block);
Minecraft.getMinecraft().getRenderItem().getItemModelMesher().register(item, 0, new ModelResourceLocation(item.getRegistryName(), "inventory"));

This is gonna create an item from our block then render the block in the inventory. It works exactly like the item registerRender() method.

Next we will want to create a block and an item block. So go ahead and add those two fields.


1
2
public static Block tutBlock;
public static ItemBlock ibTutBlock;

We need to create an ItemBlock so that we can convert the block from a block to an item for rendering in the inventory. In our init() method, we will initialize our block and itemblock.


1
2
3
tutBlock = new BlockTutBlock(Material.ROCK, "tut_block", CreativeTabs.BUILDING_BLOCKS, 5F, 15F, 3, "pickaxe");
  
ibTutBlock = (ItemBlock) new ItemBlock(tutBlock);

Let me break down what kind of set up we are doing here for the block initialization.

==========================================Explanation==========================================

Material.ROCK is our block material. Block Materials are very unique cause they determine how they are mined and what effects they have in the world. For example: PORTAL is a block material that has no collision and when collided, it transports the player to another dimension. CACTUS hurts the player, etc.

"tut_block" is our name, being the registry name, and the unlocalized name.

MAKE SURE YOU DO NOT CAMELCASE!!!!!!

CreativeTabs.BUILDING_BLOCKS is what creative tab our block will be found in. You can choose a variety of different creative tabs. Eventually we will create our own ;) *hint hint*

5F is the hardness. Diamond Ore is around this floating point, so our block is very hard.

15F is the resistance to explosions. 15F is a very resistant block. The higher the number, the more resistant. You can play around with this float until it meets your likings.

3 is the harvest level that is needed minimum to be mined. 3 is diamond tier, 2 is iron, 1 is gold and stone, and 0 is wood.

"pickaxe" is the type of tool needed to mine this block. You can choose from "axe" to "shovel" but we are choosing "pickaxe" for obvious reasons.

Our ItemBlock init takes in a block, which is our newly created block. This will create an ItemBlock from it, as you can tell. We have to cast it to an ItemBlock so that we can register it as an item block later on.

=============================================================================================

Next step is to create a class for our Block, just as we called it in our code, BlockTutBlock. Put it in a new package called "com.<yourname>.tut.blocks". We will extend it to a new class called ModBlock. In this, we will create two different constructors, one with a harvest level, and one without.


 1
 2
 3
 4
 5
 6
 7
 8
 9
10
11
12
13
14
15
16
17
18
 public ModBlock(Material mat, String name, CreativeTabs tab, float hardness, float resistance, int harvest, String tool) {
  super(mat);
  setUnlocalizedName(name);
  setRegistryName(name);
  setCreativeTab(tab);
  setHardness(hardness);
  setResistance(resistance);
  setHarvestLevel(tool, harvest);
 }
 
 public ModBlock(Material mat, String name, CreativeTabs tab, float hardness, float resistance) {
  super(mat);
  setUnlocalizedName(name);
  setRegistryName(name);
  setCreativeTab(tab);
  setHardness(hardness);
  setResistance(resistance);
 }

These set the basics for our block and more depending on the constructor you're using.

Back into our BlockTutBlock class, we will add the constructor needed to complete our initialization.


1
2
3
 public BlockTutBlock(Material mat, String name, CreativeTabs tab, float hardness, float resistance, int harvest, String tool) {
  super(mat, name, tab, hardness, resistance, harvest, tool);
 }

This will set the material, name, tab, hardness, resistance, harvest level, and harvest tool, of our block automatically. It looks much cleaner than manually adding them in every class.

Next is registering and rendering the block. We need to register the block and item block at the same time. We need to register the item block with the same registry name as the block so that they are registered as the same thing, otherwise it won't work. We are using "item.getRegistryName()" in our registerRender, which is set by registering the item block with the same registry name as our block.


1
2
3
4
5
6
7
8
 public static void register(){
  GameRegistry.register(tutBlock);
  GameRegistry.register(ibTutBlock, tutBlock.getRegistryName());
 }
 
 public static void registerRenders(){
  registerRender(tutBlock);
 }

The second parameter of the register method is the name set for that object.

We are ready to get into models, blockstates, and texturing. In our "assets.tut" package, we need to create a package called "blockstates". We need to go find the blockstates file for "diamond_ore.json", in Referenced Libraries > forgeSrc > assets > minecraft > blockstates. Look for "diamond_ore.json" and copy the code within it. We will create an Untitled Text File for our new blockstates JSON file. Name it after your block's registry name, in this case it is "tut_block". Rename the model reference to "tut:tut_block".

1
2
3
4
5
{
    "variants": {
        "normal": { "model": "tut:tut_block" }
    }
}

Blockstates is the state of the block model. Some blocks use a blockstates JSON file that specifies what model to use depending on which way it is facing. For example: furnaces use a blockstate that states that depending on which way the player is facing, it will rotate the model so that a specific side is facing towards the player.

Next we need to create the block model in our "assets.tut.models.block". This is where we will specify what the block looks like and what texture to use. We will steal from "assets.minecraft.models.block.diamond_ore.json". Change the texture name to your texture location.

1
2
3
4
5
6
{
    "parent": "block/cube_all",
    "textures": {
        "all": "tut:blocks/tut_block"
    }
}

This is using the parent of "block/cube_all" which is a generic block model. "'textures':{" points towards the texture that will be rendered. When we get into multi-textured blocks, we will discuss this more but just know that "all" specifies ALL the sides of the block.

Next is the item block model. Let's steal from "assets.minecraft.models.item.diamond_ore.json" as well.


1
2
3
{
    "parent": "tut:block/tut_block"
}

This model specifies that we want to render the model just like the block model, but in our inventory.

Now create your texture and place it in "assets.tut.textures.blocks". We need to call the init, registry, and registerRenders methods in our proxies.

ClientProxy:


1
2
3
4
 public void init() {
  ItemHandler.registerRenders();
  BlockHandler.registerRenders();
 }

CommonProxy:

1
2
3
4
5
6
7
 public void preInit() {
  ItemHandler.init();
  ItemHandler.register();
  
  BlockHandler.init();
  BlockHandler.register();
 }

Now we can run the game and test out our newly created block.


=======================================Block Properties=================================


Dropping an Item:
To drop an item from the block we will need to go into our block class and override a method from the Block class called "getItemDropped()".

TIP: You can use CTRL+SPACE to view a list of methods to override from the superclass!!!

We need to return an item. So in our method we need to return ItemHandler.tut_item.

1
2
3
 public Item getItemDropped(IBlockState state, Random rand, int fortune) {
  return ItemHandler.tutItem;
 }

This will make the block drop our item that we created earlier.

Quantity Dropped
We will need to override a method that will allow us to specify a specific amount of items dropped. This method is called quantityDropped(). It is of the type int, so it will need to return an integer. Return whatever number you wanna return. I am gonna be doing a random number between 1 and 5, so here is my code:

1
2
3
 public int quantityDropped(IBlockState state, int fortune, Random random) {
  return random.nextInt(5) + 1;
 }

"return random.nextInt(5)" generates a random number between 0 and 4, So we must add "+ 1" to our code so that it generates  number between 1 and 5.


Multiple Items Dropped
If you want to have your block drop multiple items, you must create a variable to hold the random number. We will call it "chance". We will make it be a random number between 0 and 1. We will also check if the number is a certain number and make it return the item we want it to drop.


 1
 2
 3
 4
 5
 6
 7
 8
 9
10
11
 public Item getItemDropped(IBlockState state, Random rand, int fortune) {
  int chance = rand.nextInt(2);
  if(chance == 0){
   return ItemHandler.tutItem;
  }
  if(chance == 1){
   return Items.DIAMOND;
  }
  
  return ItemHandler.tutItem;
 }

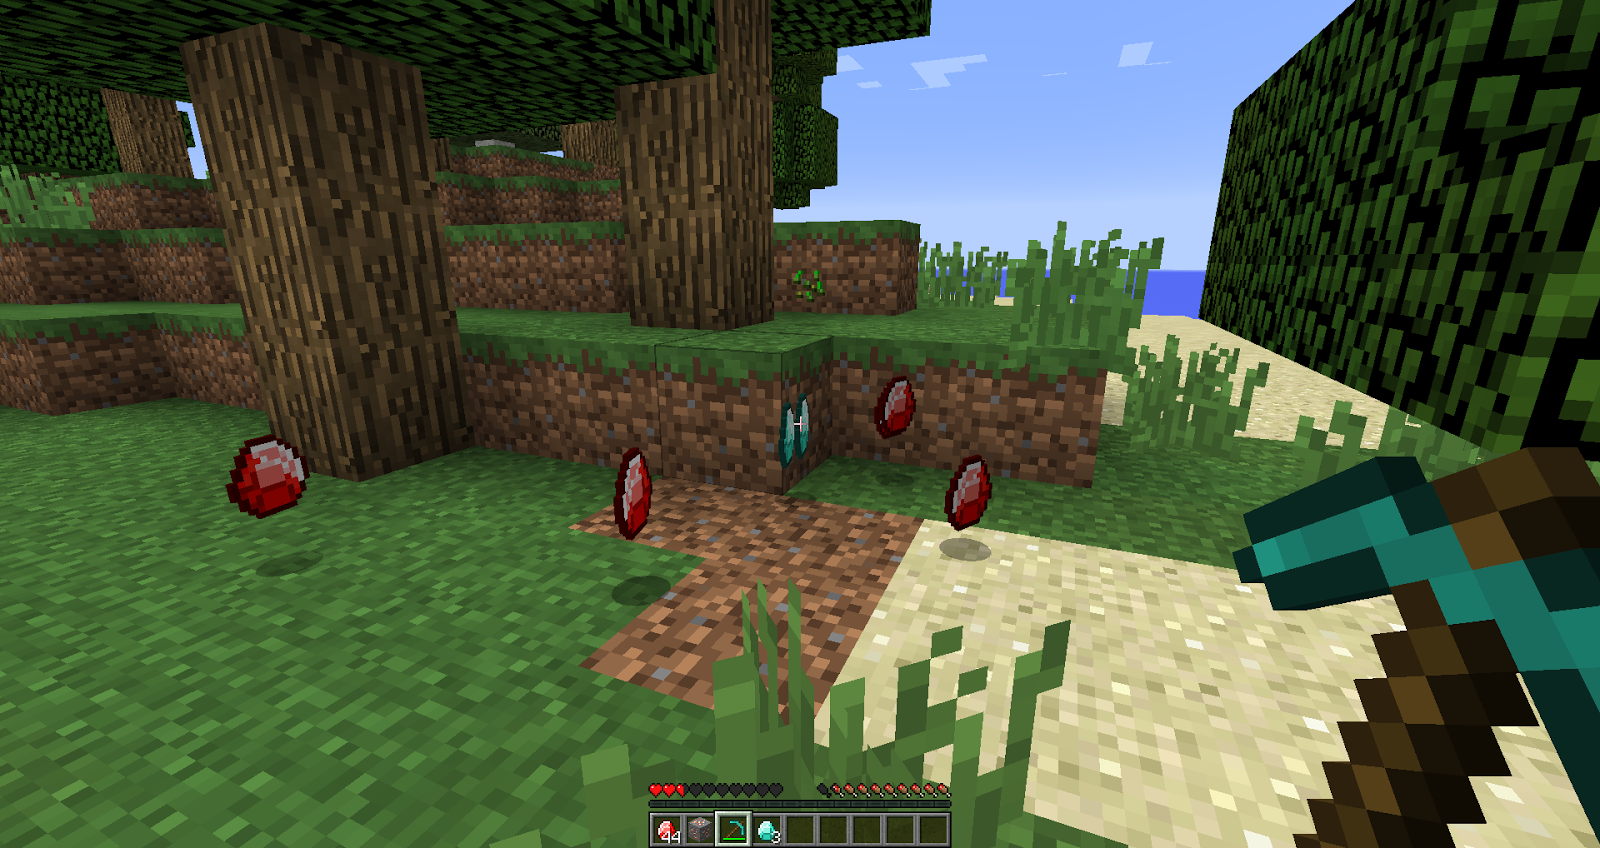
The end result is this:


Wednesday, February 1, 2017

Items

Hello, my name is Alex and I am going to show you how to create a mod for minecraft forge 1.11.2. There's not a lot of tutorials on 1.11 so I am creating one for those that want to get started.

WARNING: IF YOU DO NOT KNOW ANYTHING ABOUT JAVA, PLEASE LEARN THE BASICS BEFORE ATTEMPTING TO FOLLOW ANY MODDING TUTORIALS!!!!!


In this tutorial, we will be creating an item. Go ahead and create a new package called "com.<yourname>.tut.handlers". Within that, create a class called "ItemHandler". This is where we will initialize all of our Items.

Within this class we will create four methods, as follows:

 1
 2
 3
 4
 5
 6
 7
 8
 9
10
11
12
13
14
15
 public static void init(){
  
 }
 
 public static void register(){
  
 }
 
 public static void registerRenders(){
  
 }
 
 public static void registerRender(Item item){
  
 }

"init()" is where we will initialize all of our items. "register()" is where we will register our items. "registerRenders()" is where we will be registering our rendering so that forge knows where to find the models and textures. "registerRender(Item item)" is how we will be telling Forge to look for our models and textures.

Within the "registerRender(Item item)" method, we will need to type in the following line of code:

1
Minecraft.getMinecraft().getRenderItem().getItemModelMesher().register(item, 0, new ModelResourceLocation(item.getRegistryName(), "inventory"));

This just tells Minecraft to look in a specific namespace, being ours, rather than its own. Next we will create the field necessary for creating our item.

1
public static Item tutItem;

Now to initialize it in our "init" method:

1
tutItem = new ItemTutItem("tut_item", CreativeTabs.MATERIALS);

What we have done is we have created an item called "tutItem" and we initialized it to a new "ItemTutItem" which is a class we have not created yet. We gave it the arguments of a string "tutItem" which is the registry name and unlocalized name. The second argument is the creative tab our item will be in.

Now let's create a new package called "com.<yourname>.tut.items" and create a new class called "ModItem". In this we will create some constructors that will automatically set some configurations for our items. There will be a constructor that takes in a stacksize integer as well as a string and a creative tab. This class will also need to extend to "Item" class.

 1
 2
 3
 4
 5
 6
 7
 8
 9
10
11
12
 public ModItem(String name, CreativeTabs tab){
  setUnlocalizedName(name);
  setRegistryName(name);
  setCreativeTab(tab);
 }
 
 public ModItem(String name, CreativeTabs tab, int stacksize){
  setUnlocalizedName(name);
  setRegistryName(name);
  setCreativeTab(tab);
  setMaxStackSize(stacksize);
 }

The two different constructors will be used by its constituent classes. One constructor is a basic constructor, and the second constructor is for items that have a different max stack size (i.e.: snowballs have a max size of 16).

Now create the "ItemTutItem" class and extend it to "ModItems". Create the constructor for the class as it shows below:

1
2
3
 public ItemTutItem(String name, CreativeTabs tab) {
  super(name, tab);
 }

We are now finished with this class. Go back to your "ItemHandler" class and register your item in your "register" method.

1
GameRegistry.register(tutItem);

Register your rendering context in "registerRenders" method:

1
registerRender(tutItem);

Now we have to define the model files. In your "src/main/resources" folder, create a package called "assets.<modid>", so in our case it would be "assets.tut". Within this we will create another package called "models.item". Within this create a new Untitled Text File. Go into your Referenced Libraries > forgesrc.jar > assets > minecraft > models > item and look for a generic item file. We will use "diamond.json". Copy and paste everything into our newly created Untitled Text File. Now we gotta change something in this file.

Change:

1
"layer0": "items/diamond"

to

1
"layer0": "tut:items/tut_item"

This is looking for our texture. It looks for it in "assets.<modid>.textures.items". "tutItem" is our texture name. Save this and call it "tut_item.json". So let's go ahead and create a texture package called "assets.tut.textures.items". I will create a Paint.NET tutorial in time. Once you have created the texture for your item, save the item in your "textures.items" package.

MAKE SURE YOU IMPORT ALL YOUR FILES!!!!!
MAKE SURE YOU DO NOT CAMELCASE YOUR JSON FILES!!!!

We have to initialize the methods in our proxy class. So navigate to your "CommonProxy" and put in your "preInit" method the following code:


1
2
ItemHandler.init();
ItemHandler.register();

Then in your "ClientProxy" type this:


1
2
3
 public void init() {
  ItemHandler.registerRenders();
 }

These lines of code registers, initializes, and renders the items that we create, and these are very important lines of code.

Save and run the project. The end result for me is this:


Tuesday, January 31, 2017

Configurations

Hello, my name is Alex and I am going to show you how to create a mod for minecraft forge 1.11.2. There's not a lot of tutorials on 1.11 so I am creating one for those that want to get started.

WARNING: IF YOU DO NOT KNOW ANYTHING ABOUT JAVA, PLEASE LEARN THE BASICS BEFORE ATTEMPTING TO FOLLOW ANY MODDING TUTORIALS!!!!!

In this tutorial I will be showing you how to configure your project to be fit for modding. We will open up our Java Eclipse Neon.2 for this tutorial.

Your window, once loaded up, should look something like this:


The selection to the left of "Browse..." should have a default workspace folder selected. Click "Browse..." and navigate to your newly created folder with all the mod files. Make sure you select the eclipse folder, as shown below:
Click "Okay" and let then continue to click "Okay" again. Let Eclipse load up and you should be faced with the following screen:


We need to go into hierarchical view in our package explorer. Go up to the top right of your package explorer and click the downward arrow.


Go to package presentation and click on hierarchical view. Now we are ready to go.

Go ahead and open that project, go to "src/main/java" and delete the package in the folder. Now we are ready to set up our configurations.

Right click the "src/main/java" and go to New > package and name it after your website reversed, so for example: "net.minecraft" is minecraft's package namespace. If you don't have a website, then just do "com.<yourname>.<modid>". I will get into the modid later, but for now, just make the modid "tut". So mine looks like "com.couchdoescode.tut". Go ahead and create the package. Right click this package and go to New > Class. We will name this "TutorialMod". Make sure there are no spaces in your class names. Create the class and you should be presented with the following screen:


Next we will write some code finally. Above your class declaration, write the following line:

1
@Mod(modid=Ref.MODID, name=Ref.NAME, version=Ref.VERSION)

This is an annotation, which adds metadata to your class. Metadata is data about data. So for example, the carpet in vanilla minecraft has metadata. It's one piece of data, being the carpet object, and there is data about that data that tells it to render multiple TYPES of carpets, while using one object. This object can then have multiple different versions of itself and the end result is a carpet, or wood, or grass/snowy grass. This @Mod adds information to the class and tells Forge that this is the main mod class.

Within the parameters, the arguments that are passed specify the "modid", "name", and "version" of the mod. "modid" is the id of the mod, or the namespace. It is how we are going to be looking for models and textures of the blocks, items, mobs, etc that we will be creating. "name" is the name of your mod, which will be used by Forge to identify it in the console. "version" is kinda self explanatory. It is basically the version of your mod, not the game.

Now onto creating the "Ref" file that needs to be created. There are errors which we need to resolve and this is how you fix it. Right click the package again and create a class called "Ref". In this we will need a few lines of code. So go ahead and type in the following lines of code:

1
2
3
public static final String MODID = "tut";
public static final String NAME = "Tutorial Mod";
public static final String VERSION = "1.0_a";

These are constants that we will be relying on for the next few tutorials. Once you put these into your "Ref" class, and save it, the errors will go away.

==========================================Proxies=============================================

We have to set up our proxies now. Proxies are Forge's way of finding models and textures and registering everything in the game. First, create a new package called "com.<yourname>.tut.proxy". Within this, create two classes called "ClientProxy" and "CommonProxy". Also, create an interface called "IProxy". In "IProxy", create three methods as follows:

1
2
3
public void preInit();
public void init();
public void postInit();

These are methods that our classes can use. They are like blank blueprints. We will call these methods and whatever classes that are implementing them, they will be called as well.

In the "CommonProxy" class, we will implement "IProxy" like this:

1
public class CommonProxy implements IProxy{

You will have a red line under your class name, so go ahead and add unimplemented methods so that your class then looks like this:

 1
 2
 3
 4
 5
 6
 7
 8
 9
10
11
12
13
14
15
16
17
package com.couchdoescode.tut.proxy;

public class CommonProxy implements IProxy{

 public void preInit() {
  
 }

 public void init() {
  
 }

 public void postInit() {
  
 }

}

Next, in your "ClientProxy" extend your class to "CommonProxy" like this:

1
public class ClientProxy extends CommonProxy{

This allows us to use the methods that are also in "CommonProxy" but the difference is one is CLIENT side and one is SERVER side. "ClientProxy" is where we will be putting Tile Entities in, or anything that is processed on the client side. "CommonProxy" is where we will be registering our models and textures and everything else in the game, so like blocks and items.

In your "TutorialMod" we have to add some methods. Enter them as follows:

 1
 2
 3
 4
 5
 6
 7
 8
 9
10
11
 @EventHandler
 public void preInit(FMLPreInitializationEvent event){
 }
 
 @EventHandler
 public void init(FMLInitializationEvent event){
 }
 
 @EventHandler
 public void postInit(FMLPostInitializationEvent event){
 }

The "EventHandler" annotation tells Forge that the method is an event handler, and will be loaded by Forge Modloader. "FML(Pre/Post)InitializationEvent" are classes that Forge also uses to process events before, during, and after the game is loaded, respectively. We will be putting game registries in the "preInit", Tile Entities and anything that are done during the game, in the "init", and recipes like crafting and smelting in the "postInit".

Next, above the methods created in "TutorialMod", create a static field of the type "IProxy" called "proxy".

1
public static IProxy proxy;

Above the static field, call the "SidedProxy" annotation, declaring this field as a sided proxy. Below is what we will have to declare in order to not get any errors.

1
@SidedProxy(clientSide=Ref.CLIENT_PROXY, serverSide=Ref.SERVER_PROXY)

We will need to create "CLIENT_PROXY" and "SERVER_PROXY" in our "Ref" class.

1
2
public static final String CLIENT_PROXY = "com.couchdoescode.tut.proxy.ClientProxy";
public static final String SERVER_PROXY = "com.couchdoescode.tut.proxy.CommonProxy";

Make sure you import everything in all your classes. A quick way to do it is "CTRL+SHIFT+O".

In your methods, call your proxy methods.


 1
 2
 3
 4
 5
 6
 7
 8
 9
10
11
12
13
14
 @EventHandler
 public void preInit(FMLPreInitializationEvent event){
  proxy.preInit();
 }
 
 @EventHandler
 public void init(FMLInitializationEvent event){
  proxy.init();
 }
 
 @EventHandler
 public void postInit(FMLPostInitializationEvent event){
  proxy.postInit();
 }

Now we are finished setting up the mod. Run the project by clicking the green play button at the top, and make sure that it is all correct.

==========================================Common Errors=====================================


Error #1: Attempted to load a proxy type ClientProxy into TutorialMod.proxy, but the types don't match
    This is simply an error caused by "ClientProxy" not extending "CommonProxy".